Strapi authentication via Google Provider with React
This tutorial shows a small example how to allow users to log in and sign up with their google accounts in a strapi and react based application.

I personally, and some of your users, might prefer to just use their Google account to sign into your application. Luckily strapi makes this process very easy and in the following tutorial we will see which exact steps we need to take to enable this functionality.
Setup
I will assume that we are starting with
- a bare strapi project
- an react application (in this example created with Create-React-App and react-router and axios installed)
Step 0 - Create Google Credentials
Feel free to skip this step if you already have your Client ID and Client Secret from the google developer console. However, please make sure that the redirect URL is pointed to http://localhost:1337/connect/google/callback
If not, you might want to head over to this short post describing how to create google oauth credentials
As we can see this screen asks us to provide a Client ID and a Client Secret. If you haven't done so already, we need to create credentials in the google developer console.
Step 1 - Configure Google Credentials in Strapi
With our shiny new credentials we can now start to configure the Strapi Provider.
When navigating to Roles & Permissions in strapi admin we need to switch to the Providers page. This site lists all authentication providers offered by the plugin. By default only Email is enabled.
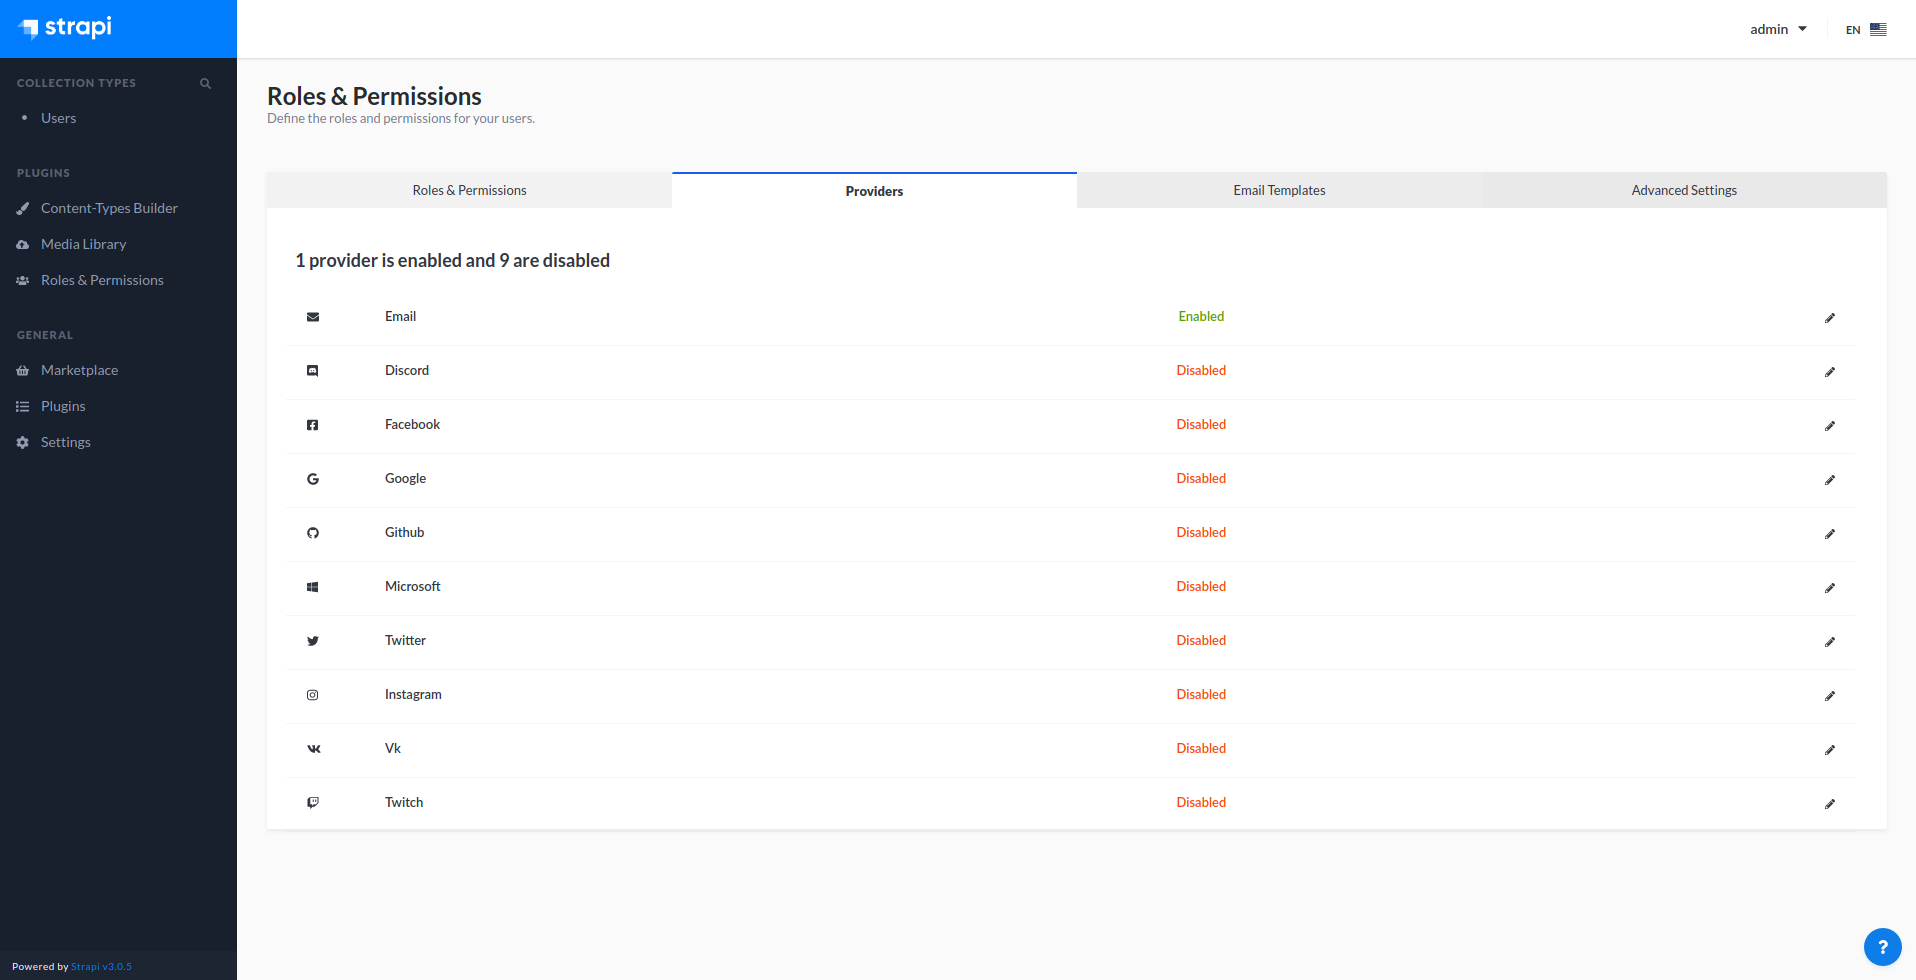
Since we want to enable authentication via Google, we need to edit the corresponding entry.
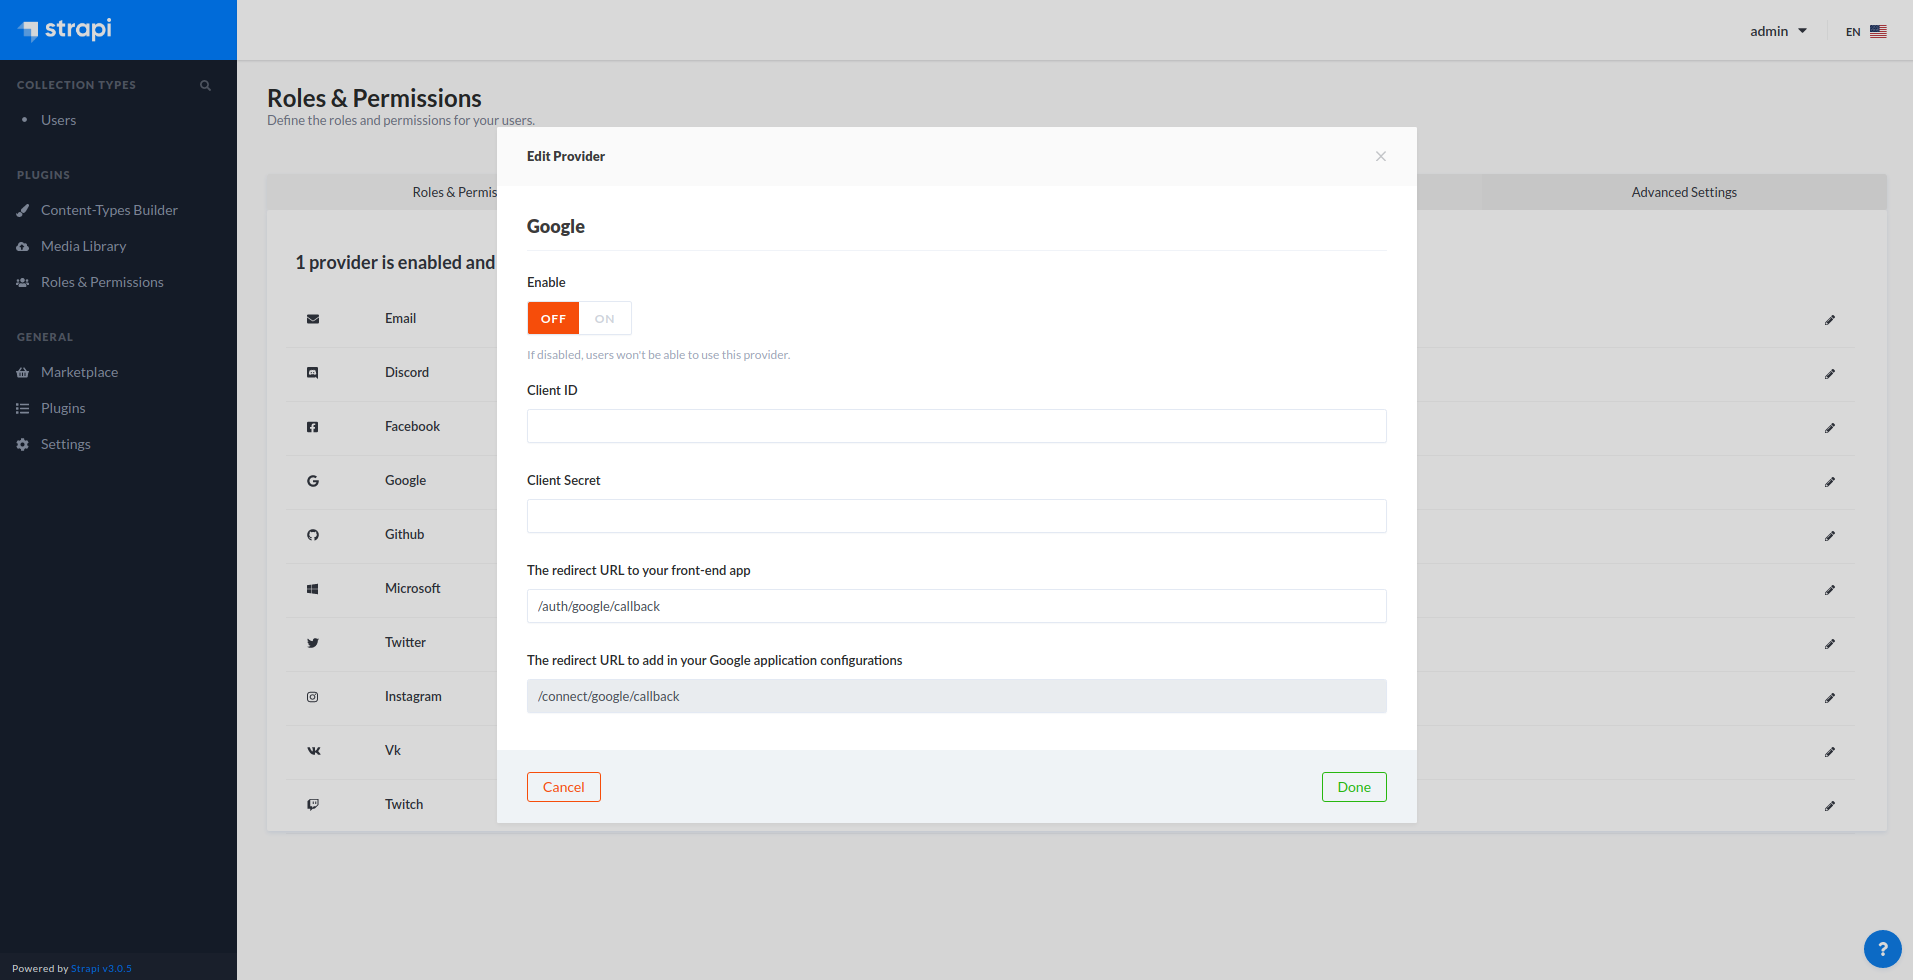
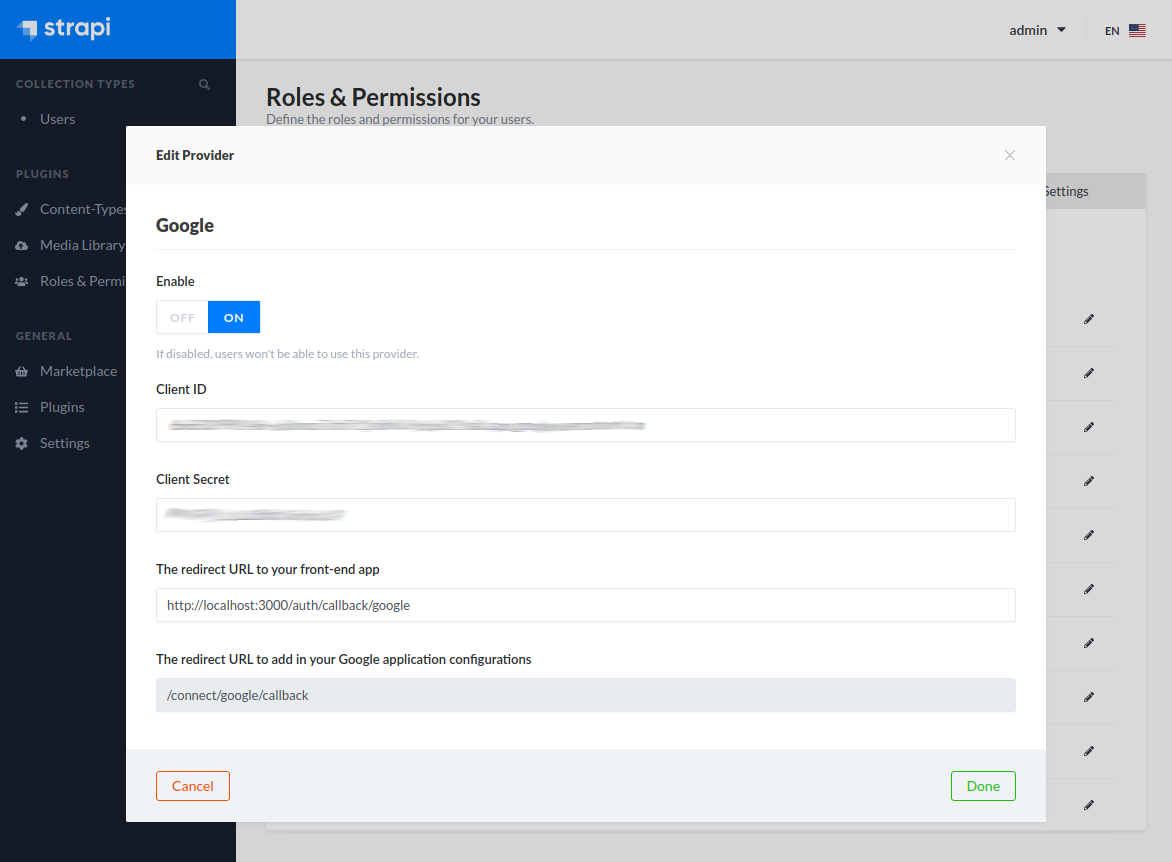
Configure the Provider with your Client ID and Client Secret:
On the Strapi side there is only one step left we have to do. We need to configure the url in the config/server.js (strapi version 3+, in version 3-beta and below you need to configure the config/environment/server.json file) file
module.exports = ({ env }) => ({
  host: env('HOST', '0.0.0.0'),
  port: env.int('PORT', 1337),
  url: 'http://localhost:1337',
})
And that's it for the Backend! Now we can move over to our frontend and use the authentication.
Step 2 - Frontend Authentication
Our frontend application consists of two screens:
- A page with a Login button

- A redirect page which handles the callback after a user was authenticated via Google

In this example I'm using react-router to handle the routing between the pages. This is done in a simple src/App.js file:
import React from 'react'
import { BrowserRouter as Router, Route } from 'react-router-dom'
import './App.css'
import GoogleAuthCallback from './GoogleAuthCallback'
import Home from './Home'

function App() {
  return (
    <Router>
      <Route path="/auth/callback/google">
        <GoogleAuthCallback />
      </Route>
      <Route exact path="/">
        <Home />
      </Route>
    </Router>
  )
}

export default App
On our Home or Login page we present a button to authenticate via Google to the user. When this button is pressed, we redirect to our already configured strapi backend via STRAPI_BE_URL/connect/google to initiate the authentication process with google.
src/Home.js
import React from 'react'

const Home = () => {
  return (
    <div className="App">
      <button
        onClick={() =>
          (window.location = 'http://localhost:1337/connect/google')
        }
      >
        Login via Google
      </button>
    </div>
  )
}

export default Home
Then, if the user is not already registered with google on our application, he is redirected to the Google Consent Screen, where he allows our application to access his data. Afterwards, the user's browser is sent back to strapi and then to our configured callback url, which is: http://localhost:3000/auth/callback/google. On this url we have a page that accepts, handles and process data from the callback: src/GoogleAuthCallback.js
import React, { useState, useEffect } from 'react'
import { useLocation } from 'react-router-dom'
import axios from 'axios'

function GoogleAuthCallback() {
  const [auth, setAuth] = useState()
  const location = useLocation()
  useEffect(() => {
    if (!location) {
      return
    }
    const { search } = location
    axios({
      method: 'GET',
      url: `http://localhost:1337/auth/google/callback?${search}`,
    })
      .then((res) => res.data)
      .then(setAuth)
  }, [location])

  return (
    <div>
      {auth && (
        <>
          <div>Jwt: {auth.jwt}</div>
          <div>User Id: {auth.user.id}</div>
          <div>Provider: {auth.user.provider}</div>
        </>
      )}
    </div>
  )
}

export default GoogleAuthCallback
Here we take the queryparameters we received in the url and exchange with our backend for the user's credentials, which we can then store any way we want on our frontend.
Summary
Adding a Login via Google to a strapi application is easy once you know the exact steps. I hope this walkthrough was useful to you!